Who we are
SumatoSoft, a software development company, helps to digitize businesses by focusing on clients’ business challenges, needs, and pain points, and by providing business goals-oriented software solutions, including expertise in AI-driven solutions.
We value close, transparent cooperation and encourage our clients to participate actively in the project development life cycle.
Services we provide


For 10+ years now we have been responsible for your projects and we are proud of it!
The system has produced a significant competitive advantage in the industry thanks to SumatoSoft’s well-thought opinions.
They shouldered the burden of constantly updating a project management tool with a high level of detail and were committed to producing the best possible solution.

I was impressed by SumatoSoft’s prices, especially for the project I wanted to do and in comparison to the quotes I received from a lot of other companies.
Also, their communication skills were great; it never felt like a long-distance project. It felt like SumatoSoft was working next door because their project manager was always keeping me updated. Initially.

We tried another company that one of our partners had used but they didn’t work out. I feel that SumatoSoft does a better investigation of what we’re asking for. They tell us how they plan to do a task and ask if that works for us. We chose them because their method worked with us.

SumatoSoft is great in every regard including costs, professionalism, transparency, and willingness to guide. I think they were great advisors early on when we weren’t ready with a fully fleshed idea that could go to market.
They know the business and startup scene as well globally.

SumatoSoft is the firm to work with if you want to keep up to high standards. The professional workflows they stick to result in exceptional quality.
Important, they help you think with the business logic of your application and they don’t blindly follow what you are saying. Which is super important. Overall, great skills, good communication, and happy with the results so far.

They are very sharp and have a high-quality team. I expect quality from people, and they have the kind of team I can work with. They were upfront about everything that needed to be done.
I appreciated that the cost of the project turned out to be smaller than what we expected because they made some very good suggestions. They are very pleasant to work with.

The Rivalfox had the pleasure to work with SumatoSoft in building out core portions of our product, and the results really couldn’t have been better.
SumatoSoft provided us with engineering expertise, enthusiasm and great people that were focused on creating quality features quickly.

SumatoSoft succeeded in building a more manageable solution that is much easier to maintain.

When looking for a strategic IT-partner for the development of a corporate ERP solution, we chose SumatoSoft. The company proved itself a reliable provider of IT services.

Thanks to SumatoSoft can-do attitude, amazing work ethic and willingness to tackle client’s problems as their own, they’ve become an integral part of our team. We’ve been truly impressed with their professionalism and performance and continue to work with a team on developing new applications.
We are completely satisfied with the results of our cooperation and will be happy to recommend SumatoSoft as a reliable and competent partner for development of web-based solutions
Together with the team, we have turned the MVP version of the service into a modern full-featured platform for online marketers. We are very satisfied with the work the SumatoSoft team has performed, and we would like to highlight the high level of technical expertise, coherence and efficiency of communication and flexibility in work.
We can say with confidence that SumatoSoft has realized all our ideas into practice.

Why companies work with SumatoSoft
No language barrier
There is no language barrier, as our employees speak English — at least B1 level for engineers and C1 level for managers.
Effective time difference management
We adjust the development process and shift our working hours to match your working day. It allows us to provide the necessary number of hours of overlap.


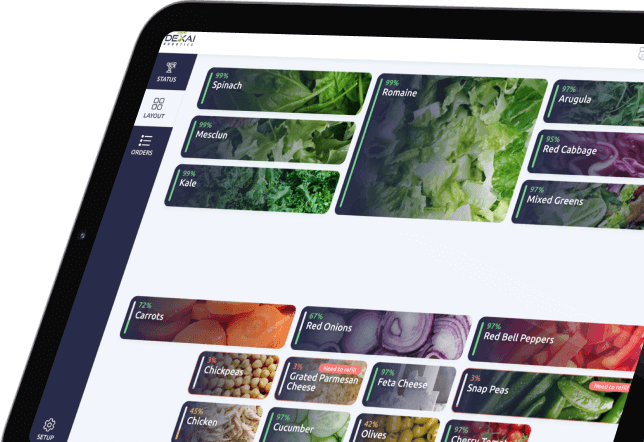
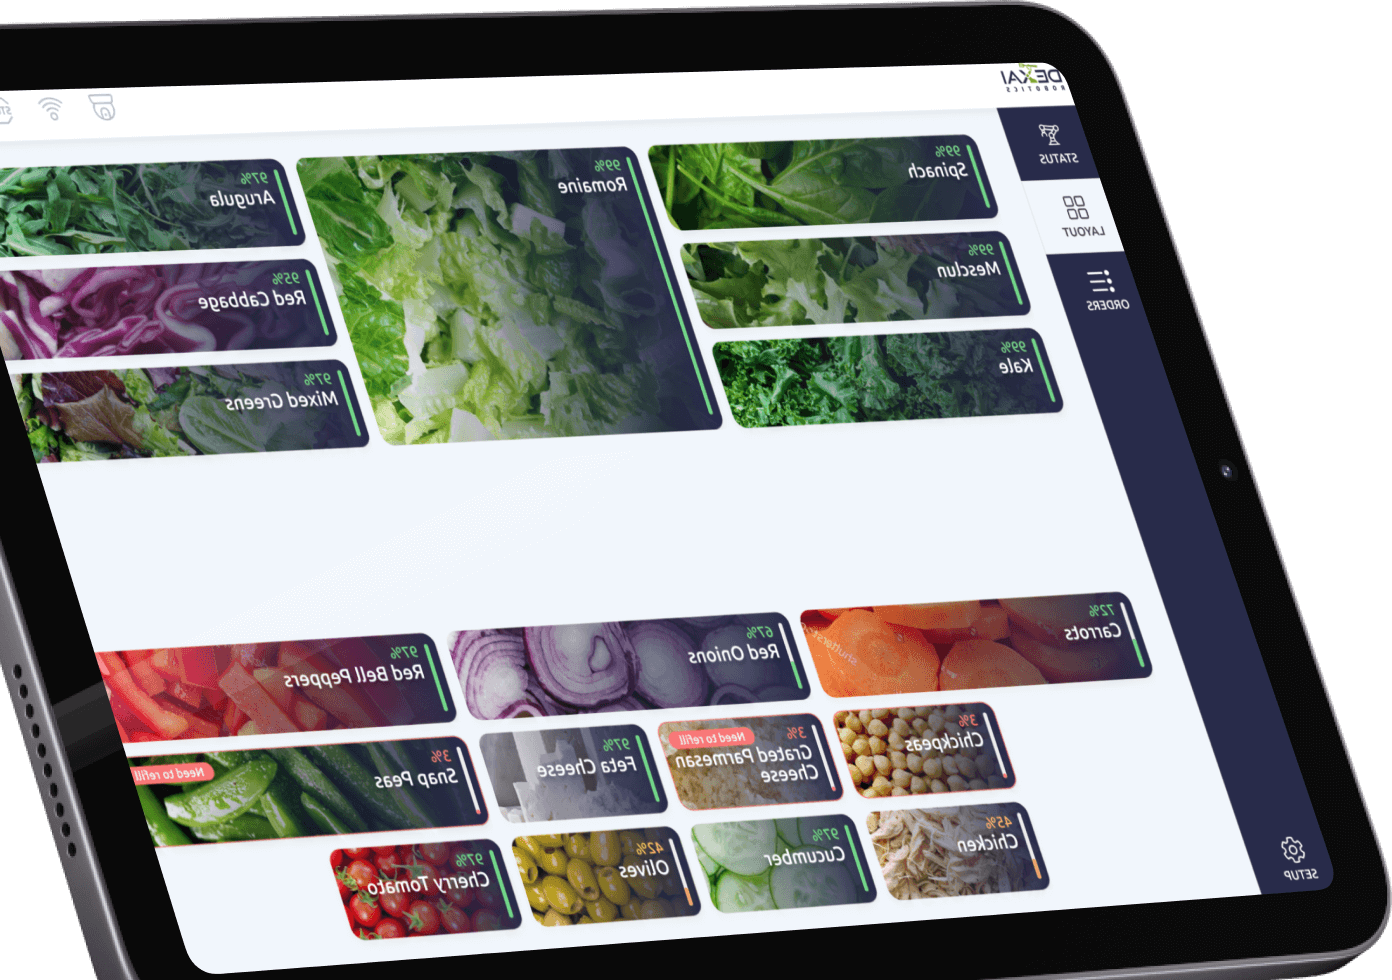
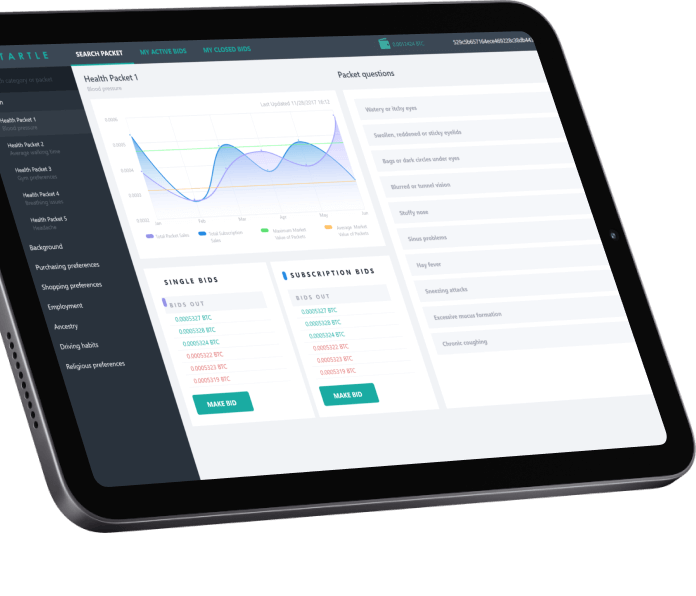
Graphical user interface for robot operation
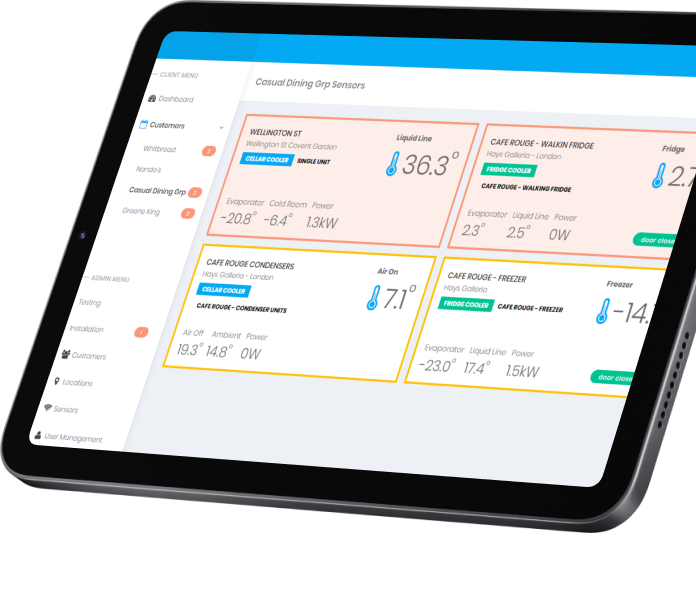
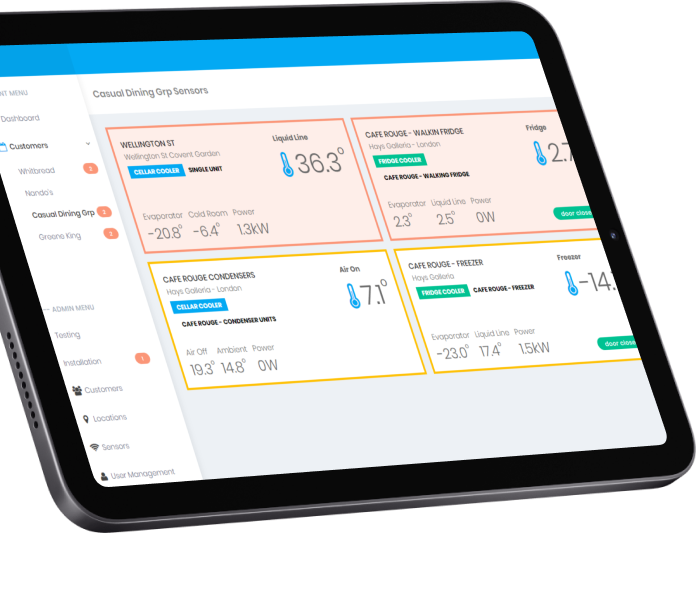
IoT application with sensors for industrial fridge monitoring
Innovative big data trading platform

Technical benefits we bring
Relevant skills & experience
All software development team members are selected with relevant skills and experience. If required, the Client can conduct interviews with the candidates whom we suggest and gather the best for the team by themselves.
Improvement & certifications
Proven experience with certifications. Continuous professional development and improvement.
All details are known in advance
Before the start of development, all the nuances of the technical part are discussed and defined — hosting, technologies, architecture, data model, security, and scalability requirements.
Experienced UX/UI designers
We hire only experienced designers with many commercially successful projects behind them.
Let’s start
If you have any questions, email us [email protected]

We have awesome stories to tell you

Frequently asked questions
I need to develop an application – where do I start?
Many great techniques and approaches may help you to answer this question (you can read about them in our blog). Still, before starting any project, including custom software development, we suggest answering 3 simple questions — Why? What? How?
- Why do you need this application? What are your business goals?
- What would you like to receive at the end? What is the outcome you expect?
- How will you do this? What options for implementation do you have?
Once you answer them, create your vision of the application, and form your requirements for a software development company, you can contact us, and we’ll discuss your idea.
I want to develop software. How much will it cost?
Software development costs may vary depending on many factors, including but not limited to the following:
- a scale of your application idea (e.g., is it a simple two-pages website or a huge enterprise-level software);
- innovations required (will it require some extra research and development, inventions, etc., or use the well-known tech stack);
- software development company experience in the tech and business domains;
- software outsourcing rates.
Each application idea is unique, and many factors will influence the cost of its implementation. That’s why we suggest our Clients get in touch with us and get the initial analysis and estimation absolutely for free.
Why does my project require a Business Analyst?
Business Analysis is the groundwork for every custom software development. It helps to understand the software potential, estimate possible risks and assumptions, and find the best solution and insights for the project implementation. The business analyst provides information, asks and answers questions, and ensures that the technical solution a tech team provides will meet stakeholders’ business expectations.
What do I need to know before contacting you?
SumatoSoft is a software development company created by a team of experienced managers, business analysts, UI/UX designers, backend and frontend developers, and QA engineers that have developed many software solutions (see portfolio of applications), from MVPs to enterprise software solutions. We know how to plan and implement your idea in the best way using the best practices in software development. And we can prove it.
I want to be involved in the development process. Will it be ok?
We believe that a software development company may provide top-level services and deliver value to the Clients only if the Clients are involved in the process. The level of involvement can be different – from being a product owner and providing just business requirements that we translate into the software solution to being an active participant in the analysis, design or development process. Anyway, we build a smooth process and regular communication with our Clients.